Introduction
Integrating Moodle with Classter enhances the management and synchronization of educational data across platforms. This guide provides step-by-step instructions to configure and synchronize key entities such as users, courses, enrollments, and hierarchies between your LMS (Learning Management Systems) and Classter. Following these instructions, you ensure seamless integration, enabling efficient data management and consistency across your educational systems. Whether you are setting up the integration for the first time or updating existing configurations, this guide will assist you in optimizing the synchronization process to meet your institution’s specific needs.
Moodle Configuration
Token Generation
1. Download the Classter Integration Plugin
2. Install the Plugin in Moodle
3. Generate and Copy the Token
→ Copy the token carefully; you’ll need it in Classter.
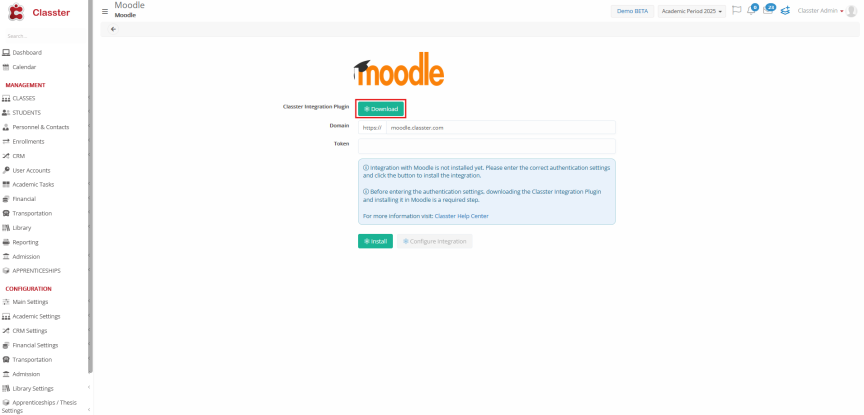
Figure 1
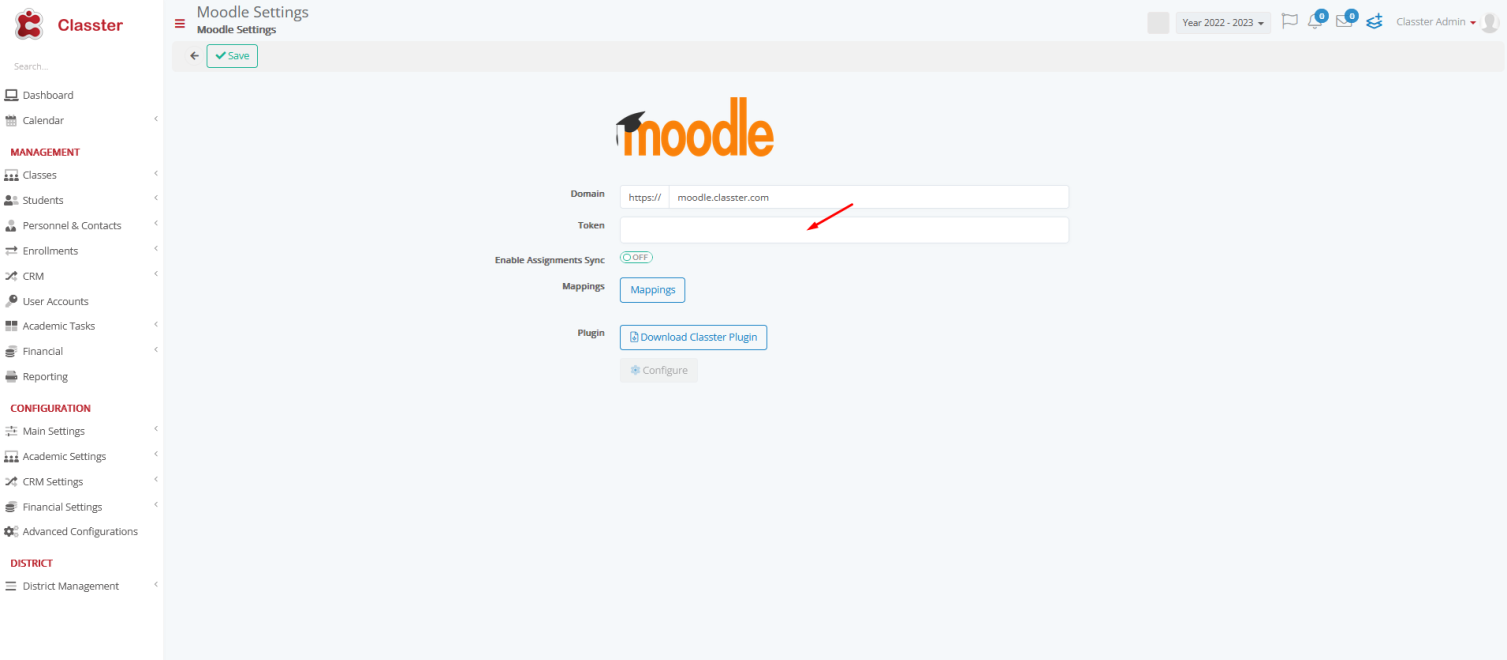
Back at Classter fill in the Token field with the copied Token (Figure 2) after following the steps according to Integrating with Moodle (Configuration Settings).
 After this, synchronization will proceed based on the LMS entity ID.
Leave A Comment